What is that smell? You know the one. When your pup smells like Fritos corn chips. Yep, that my friends, is yeast. And your favorite deodorizing spray isn’t going to cut it this time. A yeast infection in dogs can be frustrating. And without treatment, it can linger. For this, you will need to attack it from both sides, inside and out.
What Causes a Yeast Infection in Dogs?
A yeast overgrowth is typically the result of an under active immune system. When a dog’s immune system is in balance, there is actually a normal, healthy amount of yeast present. But there are things that can cause an overgrowth in yeast. A weakened immune system, certain medical conditions, and reactions to medications can all cause skin and ear infections.
Antibiotics can be particularly troublesome for when high levels of yeast are present. Dogs with allergies often develop secondary infections (don’t we know it!), and vets typically prescribe these medications to combat them. However, antibiotics can actually kill of the good bacteria along with the bad, making the situation even worse.
How to Spot a Yeast Infection in Dogs
As mentioned already, that corn chip smell is a clear indication of a yeast infection. It’s quite unpleasant. But it’s not the only sign. Uncontrollable itchiness is also evidence of a yeast issue. Especially in the ears and paws. I’m sure we’ve all seen this, they won’t be able to leave them alone. They may also do a lot of butt scooting on the carpet.
Some other signs that your dog has a yeast infection of the skin include:
- Chewing or licking infected areas
- Redness or inflamed skin
- Head shaking (with ear infections)
- Greasy, crusty, or scaly skin
- Oily hair
The only definitive way to confirm a yeast infection in dogs is by going to the vet for a skin swab. Be sure you inform the vet of the symptoms you are noticing at home so they can help address the primary issues. Then you can develop a plan to tackle the underlying issues.

Address the Diet
One of the best things you can do for your dog that is battling a yeast infection is address their diet. This is something we have dealt with for a while.
We recently used 5 Strands Affordable Allergy Test to help identify what Norman’s food and environmental intolerances might be.
I’ll be posting about the results very soon, but you can check out the original post here.
One thing you can do is try to avoid sugars in your dog’s food as much as possible. This essentially means reducing their intake of carbohydrates. Yeast feeds off sugar, and carbs break down into sugar. So if you can find a dog food that is low in carbs, you may be able to avoid some of the yeast overgrowth and reduce the chance of an infection.
Aside from the regular white sugar you may be thinking of, there are many other sources that you will want to be aware of. Where possible try to eliminate things like potatoes, corn, wheat, rice, soy, honey, and high fructose corn syrup. It’s not easy to avoid these things, as many of them are even in high quality foods. But just being aware of these carbs is a good start.
Dog food companies do not typically list the amount of carbohydrates in their foods, so if you want to know how to calculate it yourself, check out the Food Allergies page on our website. It’s actually pretty easy to figure out.
In addition, you can also try adding in anti-fungal foods, such as garlic or oregano. As long as your pup isn’t allergic to them, these can be beneficial in reducing a yeast infection in dogs.
Clean Up Your Pup
The next step in your yeast fight is to disinfect the areas where the yeast is most common. The vet can give you a medicated cream to apply to the infected area, but it needs to be properly cleaned first. Otherwise, you’re probably just making the problem worse by creating extra layers of dead yeast.
If the ears are the problem, I would suggest using some witch hazel and cotton balls to clean out the ear canals. You can buy them at any drug store. Make sure you remove as much of the debris as possible. And NEVER use Q-Tips on your dog’s ears.
If the main problem is the paws, you can make a quick at-home anti-fungal dip. For frenchies, you can probably just use the sink for this. If your dog is a larger breed, you might need to find a large plastic storage bin, or a wide bucket. Mix the following ingredients and then simply pat the paws dry. No need to rinse it off. And you can do this as often as needed.
- 1 gallon of water
- 1 cup of hydrogen peroxide
- 1-3 cups of white vinegar
For more wide spread cases that are affecting your dog’s body, you can address it with a cooling, anti-itch shampoo and an easy homemade anti-fungal rinse a couple time a week. For the shampoo, we are using a tea tree and aloe blend that smells really nice. We have gone away from recommending shampoos with oatmeal. It can actually give a boost to yeast growth on your dog’s skin.
After shampooing, use this formula below for the rinse. Be sure to avoid your dog’s eyes and ears. Just pour it over the body from the neck down and rub it in to all the problem areas. Again, there is no need to rinse off the solution. Just pat dry and be on your way.
- 1 gallon of water
- 1 cup of vinegar or lemon juice
Good Luck!
Treating a yeast infection in dogs takes a lot of time and effort. You have to be consistent in order to stay ahead of it. So if you notice any of the symptoms mentioned here, I hope this guide will help you get it under control. And please don’t wait too long to see a vet if you feel like it is getting out of hand. They can help you get a jump start on treatment!


I came across your blog because we are at our wits end with our labradoodle. She is a yeast nightmare and smells so bad all the time!! My husband wants to get rid of her and honestly so do I, but it would crush my daughter:( We got Sydney as a puppy and she is now 2.5 years old. We have never had a dog before and gave in to my daughter’s repeated begging. She has had problems with her ears since the day we got her and this past year she has developed yeast in between her toes, private’s,… Read more »
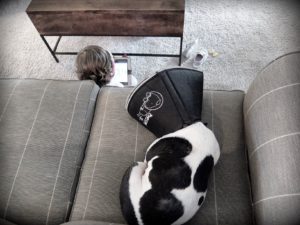
Wow that sounds pretty familiar! I know it’s super frustrating. There’s only so much you can do. I find that Norman definitely does not (or can not) do as much damage to himself with the cone on. But that food could be helping as well. I’d be interested in hearing those test results!